Friday, March 30, 2007

Quick update

Started going over the footage, so far so good.

Thought I'd show you what the final version of what The White Room should look like, it's not completely accurate, but it's pretty close.

BEFORE

and AFTER

The particles will be adjusted, maybe made smaller - but to give you an idea, they'll be constantly floating upwards throughout the entire scene.

And that's it, some of the shots are a little dark, so they'll need to be touched up. It's not a huge job, just a little touchy when dealing with some of the Resurrectionist shots - since he's rather white to begin with. The overall effect should be a weird enough looking for my taste though.

Tired and sore, but well worth it...

Well, it's over...

Not the movie, but tonight's shoot. It was a hard week of prep, very long and tiresome, but in the end - damn, if we didn't pull it off. First off, I really...REALLY have to thank everyone. Man, I've done a lot of films over the years and have expected a lot from my actors, but tonight was one of those nights were everyone pulled through 38,ooo%.

Heather, thank you so much for enduring the way too long shoot. Can I actually say here why you now need a stunt double/stand in?

Draper, the ultimate energizer actor - literally takes a beating and keeps on ticking. I put the poor bastard to the test, stuck him in prosthetic makeup, in a way too cumbersome costume and made him take a beating from a woman.

And Jordan, the newest and last minute addition to the project (and Heather's stunt double/stand-in) did an awesome job, it was a total trial by fire and she passed like I really don't think anyone else could have.

As a quick aside, can I say Draper has the most awesome job in the world - and without pay?!? Who else gets to be mauled for 5 hours by two beautiful women for no good reason?

So what we shot tonight was The White Room scene. A scene where Malice has her final showdown with The Resurrectionist. It was bascially a pretty brutal and one-sided, fight scene. I'm not a fight scene director by any means - this was one of the hardest and most tiring things I've ever done in the last 9 years of filmmaking. I've not yet edited the footage, it's pretty raw looking right now and will require a lot of editing and post work, but I'm pretty confident we got it.

I've got a few pictures, not as much as usual since my usual photographer is on the road doing a documentary right now, so I had to make due. I took some stills from the footage and some stuff from the cameras that I had friends taking at certain points, I'm posting it here - BUT! I'm not showing the face of The Resurrectionist right now, you get a pretty good impression of what he might look like, but for some reason I really wanted to keep it out of sight for now.

So here's how it all progressed:

I've been working on the basics for a couple weeks, trying to choreograph a fight scene and all. I'm busy with other work too, so trying to juggle all this is a task in itself - luckily I can pick the greatest actors in the world, so I'm good as gold on this. I got a location, a nice empty, large room to shoot in. We shot against 2 10x10 backdrops - which help the post process to really bleach out the shots.
It don't look like much, but it did the trick.
From there I sussed out the fight itself, it comes from a very popular TV show and is meant as an homage (but not in that annoying Tarantino kind of way). Draper and I plotted it out, I did storyboards until 3 last night, spent about 5 hours on it. Sorted it all out as best I could. Met with Draper around 2:30 this afternoon and from there we went, we talked about it, had coffee and whatnot then started in on the makeup. That was fun.

Here's Draper coming along in makeup.

First off, the contact lenses...What a bugger. They're huge and irritating, but we forced them in, as much as Draper is unaccustomed to having his eyes poked, we did this in about 15 minutes, maybe less. Oh, and then we dyed his hair.We got him in costume, because pulling on the shoulder piece would ruin the makeup, so he sat in this for a very long time.
I'm going to refrain from showing the makeup progression in order to "hide" the look of The Resurrectionist.

We arrived on location a little late, about 20 minutes late - but still before shooting time, so we're still kinda good. Heather and Jordan showed up right on time - thanks for being patient while we setup and you waited, by the way.

These are some stills from the footage. Bear in mind, there is an immense amount of post to be done to these images. I was hesitant to show them, but I thought it's been awhile since I posted some filming pictures, so I'll do it with that disclaimer and hope for the best.

2nd shot of the night, Heather looking to kick some ass.

Pulling a punch..
And beating down the bad guy...Actually, this is a pretty quick shot and I will point out: that's not Heather. This is Jordan doing her best to beat the crap out of evil.Ooh, he's pulling his hood back finally!

Don't touch me! We have a very strict sexual harassment policy.
Well actually it's more like an encouragement, if you know what I mean.

Punchy, punchy.

And more punchy, punchy. It was a this point we realized we can get
away with sloppy editing and fight choreography so long as there was a butt shot.

End of the night, a quick posed shot of Draper and I.
And Draper taking a quick suckerpunch from Jordan.
That's pretty much it, I'd like to show more, but it's getting late and I'm near dead. Overall, it was a great night. Thanks again to everyone, you all did a great (and even that's not a good enough word) job. It was a hard shoot, and a lot to expect after a bit of a hiatus, however we managed it. It's done, that hump has been...um...gotten over, we'll just say that and be done with it. We're done with this.

It's unusal for me to be so tired and actually feel like I accomplished something, normally I'm tired because I ate breakfast - in this case we really went to the mountain, and ended up kicking it over and beating the ever loving crap out of it.

Heather, Draper and Jordan, thanks guys - awesome job from everyone. It's all uphill from here...yes, I know what I just said. We're way more then 3000 miles from Graceland, iffen you know what I mean.

'Night kids. This blog was brought to you by FireBall.

And if it made no sense, still and even moreso...brought you by FireBall.

Keep in touch, I'll be updating in the next few days after editing. And please, although I'm not a "comment" kind of guy, I'd like to see how many are reading this blog, so please again, post a short - hell, even blank - comment if you will after reading this. And forgive the sloppy typing, really my grammar is okay, my typing not so much.

Good night, and may you be in bed and alseep before crappy late-night TV comes on.
FOX

Thursday, March 22, 2007

A little more headway

Well, things are really starting to pile up on me, to quote the song by Dan Reeder, "I've got all the f-ing working I need", (which incidently is the only lyric to the "Work Song") cleaned up for a PG rating of course.

But oddly enough as it piles up, it suddenly becomes simpler - well, not simpler, but clearer maybe. Things start finding their own place on their own and then suddenly everything kind of makes so much sense it almost seems ridiculously easy. Or perhaps it's the early onset of senility.

In any case here’s what’s transpired that’s making my life easier. If you’re following along at home, you may know we start shooting next week, and after that 2 more shoots to go and I can start to pretend I have a life again.

The main stress factor of all these 3 scenes left is the fight choreography, which is a little tricky for certain reason I won’t get into. However, I sat down tonight with Draper, whose ass it getting kicked in 2 of 3 fights, so I figured who better to discuss this with. I tried coming up with ideas on my own, nothing, he tried as well, nothing - we got together, watched a very nice little fight scene from a certain TV show that shall remain nameless, but we both agreed was a very sweet and brutal little butt-whooping (I’m going to see how many different ways I can say that). And then suddenly the entire thing was done, in less then 5 minutes we had a very doable, very exact fight choreography with a possible running time of 1:30 to 2:00 minutes. And if you think Malice looks like a badass, wait until you see her in action.

So we continued to discuss other aspects of the movie, and finally came upon the ending of the movie which involves a potentially awesome showdown between Malice and Mal’Vash - who happens to be a 20 ft tall computer generated, armor plated, demon king. I’ve been putting off thinking about this because it just seemed too much brain power was needed, but I was pretty much thinking out loud and suddenly it just spilled out - this totally weird and almost shocking way to end the final fight.

I sat down, plotted out the White Room Fight Scene, there’s really only 9 points to it, like I said, very simple. Then I started really thinking about the Final Fight, it’s about 31 points - I basically do a step by step of the scene in point form, such as; 1 - Mr. A picks up the sword and turns to face Mr. X. 2 - Mr. X lunges and Mr. A and misses, passing him on his right side and falling on his face, Mr. A moves with him, turning to stab him in the back as he hits the ground. Basically like that, when shooting you can focus on these single points rather then the whole sequence, makes it much easier I think.

So there, I now have two major battles (literally and figuratively) plotted out. One potential fight has been reduced to a very one-sided “incident”, not to diminish it’s importance, but making it simpler actually makes a little more of a statement about some changes in one of the characters.

And to top it all off, this afternoon, while doing work for another project, I was spending a few hours going through some royalty free music when I found this one piece. It is incredibly creepy and cool - and was exactly everything I wanted for the main theme of the movie. I debated about having something custom made, but upon hearing this - no contest, this is it hands down, without a doubt.

Now the soundtrack is a way off, but having this main theme in my head, almost gives me a little more sense of direction for certain aspects of the final parts of the movie. In any case, what once felt like months of work, now feels like a week or more...I’m really hoping it’s not the senility thing.

Thursday, March 15, 2007

The New and Exciting FireStore FS-4HD

As you can probably see by the picture down below, my new FireStore digital drive finally arrived and we're ready to film again!

Look, it's Happy Fun FireStore!

Well, not just yet - still a few things to work out. I managed to (hopefully) secure the last of my locations for the remainder of Heather's scenes, and I'm pretty happy with them, should be able to get exactly what I was hoping for out of them. We'll be shooting The White Room scene at the old Bascillica (is that spelled right?) Rec Centre - which is now known as Murphy's Community Centre (and to correct all those folks saying it was bought by the "Murphy's", you're wrong, very wrong - it's Ray Murphy of Murphy's Pharmacy), and we'll be filming the finale of the movie there as well - if we can work out the details.

One of the pluses about filming there, besides them being very accommodating and opened minded, is that for the fight scenes I was wondering about getting hold of some gym matts (you know, those big, flat blue things from high school?) and they have piles of them there all for us to use. So another problem solved. The only downside is I have to rent the space, not a huge expense, but one I wasn't planning on - however, since paying for something tends to make it a little more secure, at this point in time I'm more then happy to.

As far as the "work out the details" I mentioned before, concerning the shooting of the finale of movie. I have 2 choices. I can cut it up into 3 sections, which means 3 shooting nights, or I can do it all at once. The 2nd choice is my favorite, since it'll prevent and major inconsistency errors - if we shoot in one place on 3 separate occassions, who knows how much it could change from shoot to shoot. And if we shoot there once and for whatever reason can't get back in - we have to reshoot the first scene - so I'm leaning way towards the 2nd choice.

So how does this work with filming at the Centre? Well, the area I want to shoot in is normally set up with tables, about 50 of them, so they'd have to take them all down and put them all back in place afterwards(doing this only once is obviously a much easier chore then 3 times) and since I have to rent the place, it'd be the difference of a lot of money.

Now the only catch to all this - filming at night, in this location - all at once means an overnight shoot. I wasn't told outright to go away, I was rather happy that they were willing to entertain the notion and that they try to see if someone who works there would be willing to stay there all night with us. So I offered, in addition to rent, to pay this poor person's wage for the duration. I figured it was really the only logical and decent thing to do, especially considering I've got no other options at this point.

So we're still working on that, the overnight shoot, which would signal a very huge turning point in the shooting of this project. I'm hoping it happens, it'll be a lot of work and very tiring probably, but there's really no other options right now and right now is when it has to happen.

That's pretty much it for now.

Sunday, March 11, 2007

Scenes from a library

In the midst of doing several different things at once for this project and a couple others, one thing that’s been a huge breakthrough for me has been the way I do my character animation. I recently did a little work into learning how to make more elaborate rigs with which to animate my 3D characers. I may have mentioned this before, if not, the “rig” I’m talking about is the skeletal system that animates the 3D model much the same way a real skeleton kinda helps you move around - more or less, there’s probably a better way to describe it...but, what can you do?

This will help me for at least 3 projects I’m working on, the 1st being the contract work I’m doing, the 2nd Dan Caseley’s animated movie (which is going to look so much better now) and of course, The Monkey Rodeo. I’ve done the new rig a few times now and I pretty much have it down, still a few bugs to work out, but I understand the basic principals enough to slap together a rough version for some minor animations.

The point of all this being, yesterday I went to work building the 3D model version of the live action area from The Library Scene. It was pretty simple actually. I own the props, so it was just a matter of some quick measurements an with an hour or so I had a pretty decent mockup of the live action part of the scene (Malice standing in the doorway area, in case you forgot what I was talking about from the last couple posts). Took a little to adjust the lighting just right, still working on that actually.

And finally the last part was a little CG version of Malice - which was very quickly and roughly done. Trust me, up close it ain’t pretty, but from a distance, it looks pretty damned good if I do say so my damned self. I was even able to (again very quickly) slap a rig onto the model, so I can actually do some fairly elaborate movement with the model when the time comes. So now, since I have this, and it looks much better then I originally planned, it allows me to make some of the CG shots a little more elaborate - since I now have a decent background model to work with.

So, despite how muddy the file looks, that’s because of the conversion into this player format, hopefully you can get a bit of a sense of how it’ll look in the scene. I won’t be getting any close to the model then this, changes are the simpleness of it will be obvious the closer the camera gets.

This is the live action - very quickly touched up for
the purposes of showing you how it will look
in the final version.

And a long view of the CG version - you can see from this, there still
needs to be some work done - only the colours really,
everything else I'm happy with.


And in other news

I finally got to test the setup for The White Room fight sequence (thanks to Pete Murphy for the loan of his camera) and I’ll be damned if it isn’t going to look awesome. The test was under less then ideal circumstances and still came out exactly like I’d hoped. In the actual setting, I’ll be shooting it in a 20x20 ft room, at least - and by the way, if you know of any 20x20 rooms with a 10 ft ceiling, please let me know as all my locations are very quickly falling through.

I set this up in my living room, and if you’ve seen it, you know there’s not much room for a 10 foot wide, 10 foot high backdrop, so I settled for 7 feet high - with 1000 watts of light not 5 feet from it, as well as the camera. This caused some glare on the actor, and some shadow on the backdrop. The glare, well, not much I can do about that, but be aware of it while shooting, the shadows are taken care of in post, so no worries there.

This was actually a bit of a longshot this whole setup, it was something I’d just sort of made up thinking it should work, never really having done something like this before I really wasn’t sure. I had to cut some corners, financially speaking, because certain part to a proper backdrop like this are very expensive. Like instead of white backdrops, I had to take unbleached backdrops, the difference is $40, not much for 1, but I needed 2 - and the difference is unnoticeable in the final version.

Hopefully this scene will come together relatively soon, the delays I’m experiencing trying to get started again are starting to annoy the hell out of me - and before anyone asks, it’s shipping delays and lack of finances that are causing the problems, which is just a matter of patience, not much anyone can do about that sort of thing.

So that’s it for now, there might be another update if I make a breakthrough in something in the next couple weeks, otherwise the next thing you’ll probably be seeing in the next 2 weeks is some stuff from The White Room.

Sunday, March 04, 2007

Demonic Postwork

I thought I’d put this together to give you look at just how I put computer generated characters into a shot. Luckily this one shot I'm working on is only 18 frames, maybe less. Reason being, it’s the first time you’ll see the Wyrm Demon onscreen so I want it to be a bit of a shock at first - plus it doesn’t really need to be longer. Sometime a really quick flash of a shot it all you need to really make it work.

To get off track - because mentioning the quick flash of a shot reminds me of something. In the movie The Man With The Screaming Brain (yes, it’s nearly as bad as it sounds, but it was written by , directed by and starred Bruce Campbell, so what can you do?), there was a scene of someone falling down the stairs, which is a pretty easy shot if you got a good stunt man. I guess they did, but at one point they used a dummy - which I guess is near unheard of in this day and age, but it was only used for a total of 7 frames. It didn’t show up as a dummy and was such a quick thing, but having that one little shot that didn’t look like something a stunt man could do really helped. Anyway, back to the point.

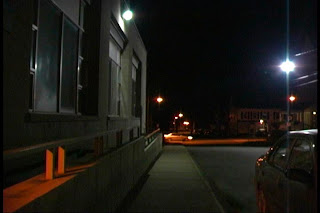
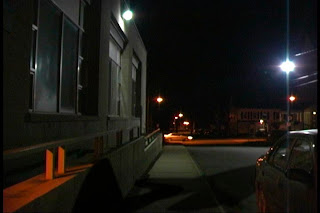
The shot is simple enough, just a quick glimpse of the demon lunging towards the camera. The background was shot way back when we shot the rest of the scene. So that’s my starting point. One thing I did when adding it into the scene was to try to recreate the basic geometry to the original scene - or at least where shadows might interact. I just use this for a visual reference and for the lights in the 3D model to cast shadows where they’re needed. After this I set the lights up as best I can to get the same light as is in the live action shot. *The shots might look a little blurry, there’s a reason for that I will get into when the time comes.

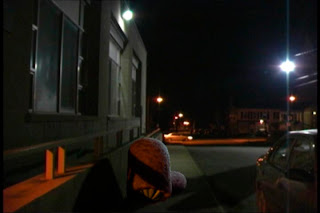
The original shot.
Now with some basic 3D models overlapping where needed. The model of the car is very basic, not used for shadows (it'll have more detail's probably in the final version), but for adding in a bit of a reflection of the demon as it passes. Hard to get things exactly right, but this shot is so quick I’m more worried about what you see then what you don’t see - so this model is good enough for what I need it to do.
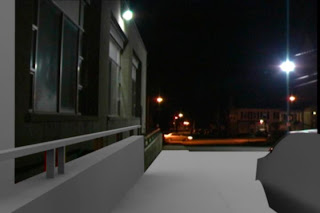
Once that’s done I bring in the demon and get him all squared away.

There’s no lighting as of yet.
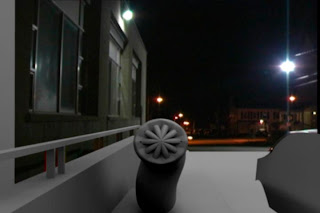
And now with some lighting. Looks a little better,
but right now there’s no texture at all to the demon.
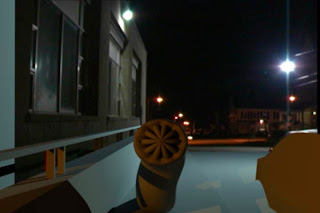
And there we go. This is the basic texture. I’ll actually be doing at least one, maybe two extras passes that will be composited with this footage to make the demon a little slimier and shinier.
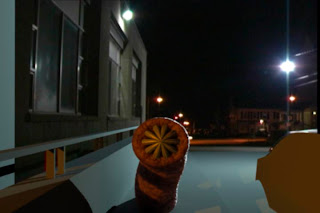
So to start the whole process I animate the demon doing it’s thing, once it’s all rigged for animation then it’s just a matter of an hours work of fiddling to get exactly the movements I want. Then I’ll break the shot down into different passes.

First Pass: a shadow pass. Underneath everything else in this shot are the shadows. The shadows will definately need some tweaking for the final version.

Then I composite this with the original shot.
They look a little wonky, particularly the one from the orange light, it doesn't quite look natural - it'll definately be fixed for the final version.

Second Pass: This is something I don’t normally do, but this shot kind of requires it. I could probably get away without doing it, but I wanted to just to add a little more to it. And that’s a reflection, logically when the demon passes by the car he should be somewhat reflected, so like I said, I could probably get away with it since the shot is so fast, but what the hell. I might as well at least see how it looks.

The reason it’s against a black background is because it'll make it easier to composite into the live action shot. It’s not perfect by any means, but it will hopefully add another layer to the shot that makes it that much more.

See...
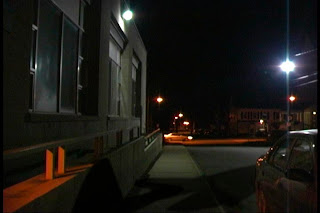
So that’s the background taken care of. You can see that’s it’s basically a matter of working my way up through the shot. Since the shadows and the reflections are more or less underneath or behind the main model, they get to come first. I actually had to adjust a few things specifically for the reflection, because the background street light was cranked up a bit more then it should be for the shot of the demon itself, so I could get a little bit of a bright edge to him on the left hand side, however, when seen from another angle it was way too bright. Also, the shininess of his skin was a little too much again for the reflection angle, so tweaked those 2 things until I got a basic reflection that I was happy with.

Now we’re left with just the demon itself to worry about. He’ll be rendered in a series of passes as well. The reason I do all these separate passes is for easier control of the final composition. Very rarely does a 3D shot match exactly the quality of a live action shot, it needs to be adjust, colour corrected and other things. Doing the shot in layers allows me to go in and adjust each layer as needed before I get too far and find out it’s not going to work. For instance, even the shadow pass has to be adjusted. I have to blur is just a bit, then lighten it, so it looks a little more natural.

Third Pass: the demon itself finally. This is obviously the most important pass, otherwise it’d just be an empty shot. Since this will be the main shot of the demon, he has to be perfectly finished, textured and everything, he actually should be finished before I even start any of this.
This is a pretty good start. He’s pretty much done. If I wanted, I could do his shadows as a separate pass as well, but it’s not really needed here. So I’m going to leave it at this.

I might as well point out at this point, one of the things that makes the Wyrm Demon work is the texture of his skin. It’s a bit complicated to explain, but it’s a process called Sub-Surface Scattering, or SSS. It’s used to create the appearance of a skin-like material, makes it look a little more real.

Best way to describe it is like this - if you’ve ever taken a bright light and placed your hand over it, your skin kind of glows around the edges of a bit. That’s because the light is actually going into the upper layers of your skin and the light is bouncing around a bit. Well, there’s probably a more technical and correct way to describe it, but that’s all I got. So if you still have no idea what I’m so terribly trying to describe, look at this.

WITHOUT SSS
(there actually is a small amount of sub-surface scattering
in this picture, just dialed way back)

WITH SSS

So the difference? That’s all I’m getting at, so moving on.

Fourth Pass: the mask. You probably seen this before if you’ve been reading this blog all along. All this is for, is to remove the actual 3D element from the live action background element. With this I can colour correct and adjust the brightness and contrast and whatever I want, without effecting the original background.

This brings us to why the images look blurry. There’s a specific quality to the images produced by a digital video camera. It may look fairly crisp when you’re watching it. But when you actually take a still image and look at it you can see it’s not really. The edges tend to bleed quite a bit. However with 3D that doesn’t happen naturally. In fact it produces extremely crisp images, too much for it to match any of my live action footage.

It’s pretty easy to adjust though, in the options to render an image you can adjust all sorts of things, the only one I’m really concerned about here is the sharpness, which is fixed by adjusting a filter to more match the quality of the live action footage. In doing this is it blurs the whole image, causing even the live action to blur - that’s not a problem since it’ll all be masked out in the end.

Fifth Pass: extra shine and glow. This is pretty simple. A normal texture has the parameters to be shiny and to what degree and all that. The basic skin doesn’t really give a high shine - at least not without effecting it to the point where you might encounter too much glowing glare here and there.

So I do the basic skin material so it looks as best as it can, then I’ll add the extra shine to get that slimy look in another pass, again it makes it easier to control it without re-rendering the whole thing. The orange light in the foreground is actually pretty low - to match the real lighting. For the shine, I’ll increase it way too much, and the same for the background street light.
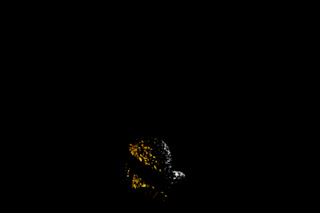
And that’s it. Once all this is done - and it takes quite a while to render all these passes - it’s just a matter of compositing them all together, making a few adjustments here and there (it's a much longer process then it sounds, but you get the point) and finally I get this:
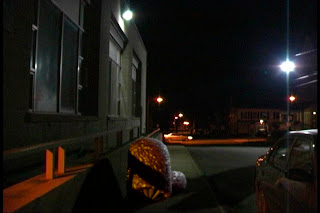
I should point out, these are pretty rough. There’s still a fair amount of tweaking to do for each pass. I’m not really happy with the way the shadows are coming out, so they’ll need to be fixed. As well as the shine, it’s a little sloppy right now, I just wanted to put this together to as a bit of a step by step example. There’s obviously a lot of steps I left out, like actually modelling and texturing - but those things are more for a tutorial or something, and incredibly boring, just so you know.

I guess the reason I would never do a tutorial on this sort of thing is because I’m making it up as I go. I honestly have no idea if any of my techniques are even slightly close to being “professional quality”, but at the same time, I really don’t care. I’m just doing this for fun and in the end it looks pretty cool, I’m not too worried about how I get there, whether or not “there’s a much faster and easier way to do that”. I’m sure there are faster and easier ways, sure it’d be nice to understand more about this, but for right now I’m not really all that concerned about it. Although, if this were my only job on this project, I would be very concerned, however I’m more interested in being efficient with my live action actors then my computer generated ones. The CG ones don’t get tired, cranky or have lives, so they’ll take as long as I damned well please to do their scenes.

Anyway, in the end, there’s 4 shots in total with this guy, so I’ll have to do this each time for each shot. The only difference being in the other 3 shots the demon isn’t interacting with the background, so there’s no need for a shadow pass, or a reflection pass. This does cut down on the amount of work and time for each shot. In total, all 4 shots, from creating the model, texturing, rigging, setting up the lighting and all the elements for the final composites - should take about a full week. Considering how relatively simple these shots and this character are, imagine how long it’ll take for some of the more major characters with actual dialogue and way more screen time.

Friday, March 02, 2007

Ugly Little Monster...well, Big Monster actually.

In the midst of working on various part of various projects, I’ve been rushing to get The Monkey Rodeo: Malice back on the go and so far it’s going rather well. I’ve been getting props, equipment and whatnot together, testing this and testing that to see how things are going to work out. Even working on some CG elements that I’ve left alone for some time.

One thing in particular is a weird little demon featured in one of the opening sequences. Like everything else this guy went through a whole pile of redesigns, I thought I’d actually settled on this strange spider-taur like creature, half human, half spider with a face that would split open with this gross looking tube-like thing coming out of it. It looked okay - but the more time I spent on this gross tube thing the better it looked and the crappier the actual demon looked in contrast.

So my only choice was the make the tube thing the actual demon. It’s sort of a Wyrm Demon, at least that’s what I’m calling it. It’s you're basic temporal slug with lots of teeth that exists in extra-dimensional space, popping out now and again to feed. It’s only in 4 shots in the entire movie so it didn’t need to have that much work put into it, still needs a bit of work, but I have to admit I’m really pleased with the result.

It’s a very simple looking thing, but visually it’s kinda gross and would be rather startling to see if it was slithering up behind you on the street. Normally I wouldn't post a picture like this, as it's really one of those things I'd like to keep under wraps until I'm ready to show the final movie, but it's not a major character in the film and hopefully it'll serve to whet folks' appetite for the final product.


This is just a quick render, I’ve done no post work to it, aside from adding a bit of a shine to it. I wanted to test how slimy I could make it look. In a couple days I should have it all set to put into each of it’s shots. On shot in particular is going to be a little tricky, still have yet to put any thought into that one yet.

See, this guy here gets a little frisky and tries to eat someone, only to be decapitated by Malice (also, one of the design needs was to have something with an obvious head of some sort, while this design doesn’t, it does have a huge mouth that will chop off just as well as a head would). I’m not sure how it’ll look in the decapitated state, I have a few little tricks I’m going to be testing out for the first time for this shot. So I’ll be sure to post some info about that when the times comes.

Until then, we should be shooting in a week or so, so make sure to come back and see what’s going on in the exciting world of indie filmmaking.