Monday, December 23, 2019

Krampus!

Finally got around to doing a Krampus shoot.

I didn't know if it would work or not since there were so many random little bits that had to come together for it to actually happen the way I wanted.


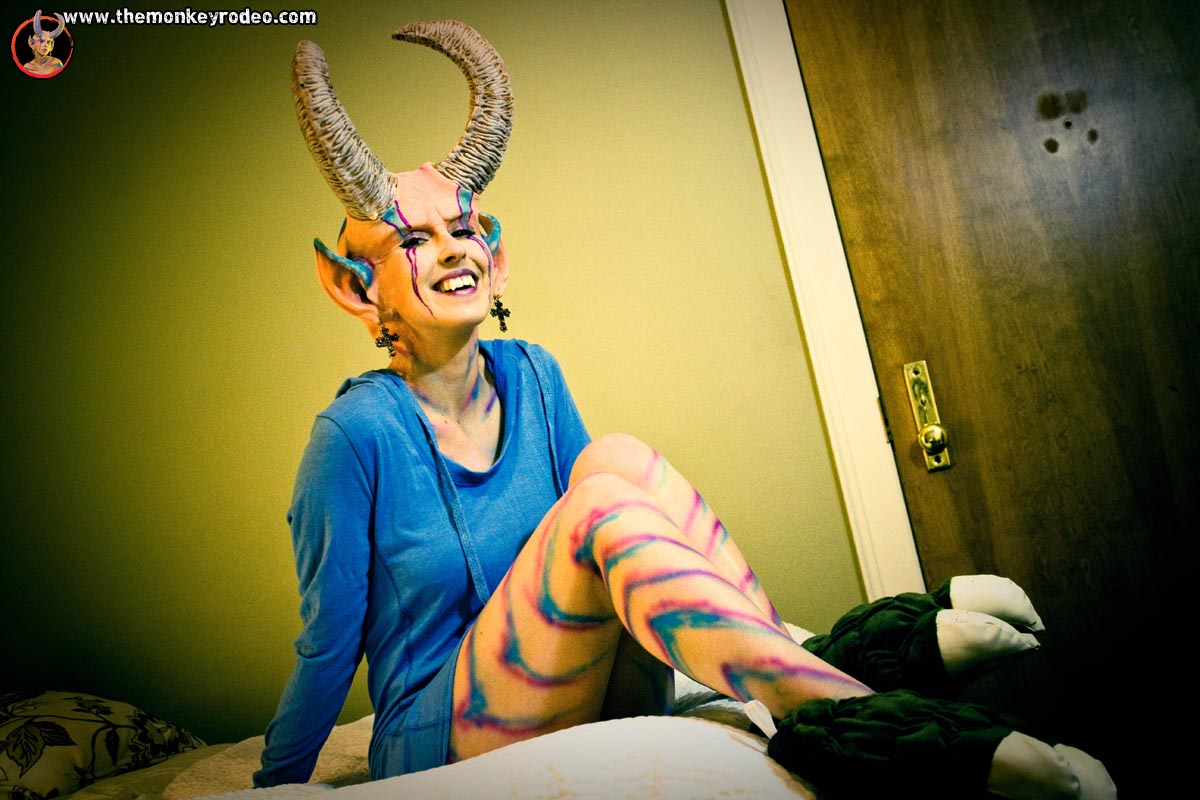
I needed horns obviously, so those were pretty much ready to go but I'd only worked with them once before and had no idea how well they'd just stick onto the forehead - it wasn't until I was making the attempt that I realized I hadn't bothered to glue down the cowl, just the face over top of it. Luckily it worked, it pulled a little, but you can't really tell and ultimately held up really well.


The cowl piece itself was essentially invisible but I needed it to make sure all the other things worked properly. It was done pretty quick and dirty but worked in the end. I pre-painted it, pre-glued all the hair down and attached the ears as well, so it was really just a matter of getting it place, gluing it down in a couple key spots and getting the face on.


I happened to already have the dentures and fake hair, so that was pretty simple to deal with. The contacts I already had as well as the claw fingernails.

The face piece gave me the most trouble. It just didn't feel Krampus-y until it was all put together and I didn't have time to do a proper mould - I would've liked to have been able to sell it - so I did another quick and dirty stone mould. It didn't hold up very well, at least I got one good copy out of it though and I can use it for reference if I decide to make another.


Aside from all the makeup, the part I felt I might've left too much to the last minute, and might have to call it off, was the costume. I had no idea how to dress Krampus, but then I remembered I still had the costume from the Dwarf shoot I did a couple years ago and it all worked perfectly.

Other than that I had a replica bell from the Krampus movie and a staff already on hand, so with some styrofoam and Worbla I whipped up a little hok sort of thing at the top of the staff and that was taken care of. The switch was just some tall grass that was dead in the yard, that was easy enough.


Night shoots are always tricky as the lighting in Charlottetown outside at night is pretty limited, but we managed to find a couple decent spots - and it wasn't too cold out so I didn't feel rushed - and with a bit of patience we managed to get quite a few really great shots.


I'm glad I finally got to do a Krampus shoot and do a good one at that. Overall with the right pieces - and I might even work on doing a whole Krampus set of prosthetics for sale next fall - I might try it again next year if I come up with some new ideas for a shoot.


Sunday, December 22, 2019

Friday, December 20, 2019

Cagaaran Demon - Logo shoot.

Needed a new logo. I've had two previous logos, the first one was literally a line drawing - no idea why I thought that would be a good representation of a business that does makeup, I think maybe I knew what I could do was limited and wanted a dramatic logo so drawing it was best??? I don't know.

So then I did a makeup logo, but it more prominently featured Worbla horns than prosthetics, so really that was terribly good a representing what I do either. So now having moved into using epoxy moulds, which allow me to do much larger and more interesting shaped pieces, I felt it was time to redo my logo once more.


So here it is. These pieces will all eventually be made for sale. What you're looking at here is a pair of horns - the largest I've ever made and pretty wearable. There's a brow the horns slot into - I pre-glued them before application with mask latex so they were permanently bonded. There's a cowl (which I might remake) and a new ear design as well.


I also knew that doing up all this makeup would take awhile and the logo shoot itself would probably take 10 - 15 minutes. So instead of just whipping all this up - by the way all these prosthetics will probably total around $300 CAD - for just 15 minutes, I decided we might as well combine it with another planned shoot and really get our worth out of it.


It was a really long day and the hotel room was actually a little chilly. It took forever to warm up so we had them bring up a portable heater that sort of helped.


Most of the outfits were stuff purchased over the years from AliExpress, some were intended for other shoots that never happened. And while most were really good, as expected some were totally janky and cheap.


I was a little concerned about how the horns would hold up during such a long shoot, or if they would even work in the first place really. This was my first time using them and I have to say I'm pretty happy with them overall. The model never complained they were too heavy or made her feel off balance, no issues whatsoever.


As I mentioned earlier, I did have to pre-glue the horns in order to avoid 2 major possible issues. 1 - they wouldn't stay on or take too long to properly adhere. 2 - they wouldn't be symmetrical. So I used a headform to place the brow piece on, used pins to lock it in place and used mask latex to glue it and more pins to lock the first horn in place. It wasn't perfect fit, but with a tiny bit of fussing it worked perfectly.

Once that first horn was glued into place I did the same thing with the second make sure they were as lined up as possible. I also pre-painted them made this all much more efficient as well. In the end they were slightly asymmetrical, but only because one of the horns wasn't totally cured when I pulled it from the mould and deformed slightly, but overall it worked as I expected.


As far as the content of the shoot, I wanted to do a whole range. Some headshots, some glamour type shots and a bit of a alt-boudoir type shoot. I find it's better to do several outfits with a boudoir shoot when the model hasn't really a lot of experience, so that in the end if there's any shots (or outfits) they aren't keen on once they see them - there's something to fall back on and you're not missing half - or all - your shoot.


And in the end we decided to attempt to destroy the makeup, and make it easier to remove, by throwing the model in a bathtub. We took a few shots in the beginning of that process before the prosthetics began to peel off.