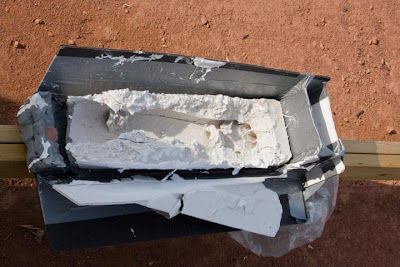
One of the simpler FX for the BZK! web series is a severed arm. I've never actually done this before, but I know the basic principles. This shouldn't be really taken as a proper "how to" sort of thing, but that's your choice.
I wanted a cheaply made fake arm for an actor to run around with, it had to be durable and take a beating while still being light and cheap. So silicone was out, although it would look pretty realistic. I thought about urethane rubber but I don't have enough experience so I finally settled on a latex, foam filled arm. This was the cheapest method I could think of.
The supplies were simple, some alginate - I think about 4 lbs was used. Monster Makers Clay, which can be melted to a liquid. Water based clay for making a 2 part UltraCal 30 mould. And finally some latex from Monster Makers and I tried using their expanding polyfoam to fill the arm with.
First, I had the actor come by, Tim Wartman, and I made a very makeshift frame for the alginate. Here's where I made my first sort of mistake. While this worked, I think the alginate I chose and the frame were all wrong. This alginate was filled with fibres for more vertical surfaces and the frame should have just been a tube - didn't have access to better frame building materials, so we had to do this.
While there's nothing really wrong with the alginate I went with, I do think it was the cause of some of the air pockets and lumps in the mould. Here I poured in the first batch of melted clay. My next mistake.
It took some time to fill it all up and let it harden again.
Here's the final clay arm. It wasn't so awesome looking.
You can see here the ridges that each batch of melted clay created. It probably would've worked better had I done one large batch, but I just didn't have the means to do that at this time.
Here's it is after I resculpted most of the surface details. I got tired of it after several hours and thought, "it's going to look cheesy anyway, why am I wasting all this time?" So I cut corners and called it done.
Forgot to get a picture of it with just the clay wall before the first coat of UltraCal, but here it is after that first coat.
And here it is with the first half of the mould done and ready for the 2nd. I kinda suck and 2 part mould making, especially something this big. I've done some decent ones in the past, but I was sort of in a hurry.
And here's what's left of the alginate mould by the way.
So, there's nothing really to see at this point, it's too hard taking pictures while I'm working. So with the 2nd half of the mould done I cleaned it all out - and I was surprised how easy demoulding and cleaning was. I was really expecting a bit of a fight here and it pretty much just popped apart.
With the final mould done I filled it with tinted latex - which is impossible to show since it's inside the mould and I can't take a picture while I'm filling it. I let that dwell in the mould for a bit - for anyone wondering what the hell that means, for latex for form a good skin you need to just let it sit in the mould while the UltraCal does its magic and sucks the moisture from the latex forming a skin.
Then you dump the excess latex out and let it cure. I left it in the sun for most of the day and overnight and thought that would do it. Unfortunately there's just no way to check, so you have to hope for the best.
The next step was to just assume the latex had cured and fill it with expanding foam. I've used Smooth-On's Flex FoamIt but thought I'd try Monster Makers foam - I had no idea it began to work so fast and here's what happened within what seemed like 15 seconds.
Luckily I had some Smooth-On foam and went with that. Filled it up and let it sit, demoulded it only to find the latex hadn't cured in spots so the foam crept though and nearly ruined the mould, I think I got it cleaned out well enough and I'm trying a 2nd now.
Here's the first arm from the mould - it's far from perfect, but for our purposes it actually is kind of perfect. There's some major surface defects, pock marks and the like. One of the fingers looks a little crushed too - however, for the scene I need it for first, the arm's been used to fend off a horde of zombies so having it look a little battle weary is just fine.
It's not painted at this point, that'll come tomorrow for a shoot the day after. It's pretty lightweight and totally safe to smack someone with, you'll feel it but it doesn't really hurt at all. Can't wait to shoot with it.
If you're reading this and thinking "Wow, that's just fascinating and awesome. I only wish there was a way I could help out, like donate money to this web series or something" than I highly recommend you follow this link: http://igg.me/p/110014?a=53757


WOW.
ReplyDeleteJust wow.
What an amazing process.
And a cool result!
Kim B