Showing posts with label corpse. Show all posts

Sunday, July 28, 2013

Moonshine of the Damned, Production Journal #14

Not a whole lot to go on about, we've been on a sort of break through the month of July it seems. We did have 3 shoots, but they were all small shoots - still important though and I'm glad we got them all done.

First, we finally got the opening sequence done - had to alter it in order to finally get it done, but I was okay with that and added a little extra to the end which I'm hoping helps tie it in better to the rest of the movie. We'll see.

The main difference was shooting with 2 people instead of the 3 I'd planned, so it wasn't too much of a change overall.


Both Alana and Michelle are really great to work with, so it went by pretty fast was at least a fun shoot if not a short one.

And here's the line of the day from that shoot:
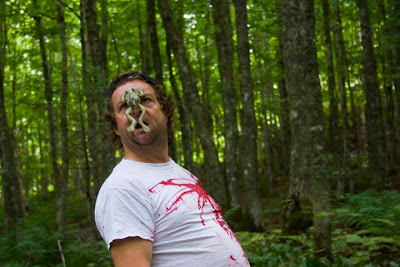
And today's shoot was the first with the Zombie Eater character, which was pretty awesome. Here's the only shot you'll be seeing of him though - when I see this I wish my video camera could get awesome depth of field shots like this, but I ain't rich so I'm sticking with what I got for now.


 Here's our small cast from the shoot. All out shoots this month seemed to only have two actors.

The biggest part of the day was finally getting to work with the full head makeup piece and seeing what the Zombie Eater would finally look like onscreen, and I'm pretty happy with it so far. It's one of those things you just make it up and hope for the best. I wasn't going for the most original looking creature every and plus I wanted to keep it simple for a couple of reason - being my first attempt every at something like this. I didn't want to go overboard and I wanted it to seem a little familiar, so I think I was able to do exactly what I intended with the character.

Here's Steve out of makeup. Rather than have him suffer in there throughout a long shoot, we shot the sequence sort of in reverse to have him done with right away.

Tim fell down a lot today.

The new and improved Zombie Frog. Last year he was just a simple, kind of fragile foam latex frog, I made him out of mask latex and was able to give him a much better paint job this time around. It was a little heavier, but we managed to keep him glued on long enough to get things done.

He stuck really well to Tim's forehead.


Overall it was a fun simple sequence to shoot. We'd done it last year so this time around it felt really familiar still and we ran through it really quickly.

And here's the line of the from today:

It's been a busy couple week, despite not shooting much. I've been spending the time getting the rest of the FX as done as possible so there's no holdups and I'm not rushing last minute to crank something out for a shoot the next morning. The biggest thing to overcome was indeed the Zombie Eater, everything else after that has been so simple.

Another big prop that I finally got turned out was the Saraphine Corpse. It needed to be simple and lightweight. I used a plastic skeleton I'd purchased last year as a quick fix zombie death sequence for one of the actors, however that ended up never even being shot and totally written out in the end, so I was left with this thing so it was a pretty obvious solution.


I went with just latex and tissue paper, some might think that's a little on the simple and cheap side, but I didn't want to destroy the thing, I can just peel all this off and reuse it for something else later - so as far as I'm concerned, the least destructive method, is always the best.

Here's a quick shot of the final prop. I used an old wig, bought for last year when this was a living character and a new dress was found and distressed and dirtied up.

Here's a closeup on the Voodoo Necklace prop - it's not something you'll be seeing up close or that will impact anything - just a small detail I wanted to add because I wanted to.

And finally a look at the facial prosthetic for the live action version of the corpse prop. Not only will this be on the live actor, but I'll be attaching it to the corpse prop as well, even if you don't see it all that well.

Tuesday, February 19, 2013

Brains, brains and more brains...

We're approaching the 1/4 mark sold of the Brain Keychains, not too bad - but I'm pretty sure we can do better. It'd be nice to have them all sold by April, if not sooner. So here's hoping - with a little help - we can get the word out there.


They're $10 each ($10.50 if you're using Paypal) + shipping 15 in Canada and $25 in the US. If you want one but you're not too keen on the shipping costs, than find a few friends who might want one and split the costs, it's as simple as that. And, if you're on PEI, you can arrange a pickup or delivery, so it's even cheaper that way.

All the funds are going towards the FX budget for the (hopefully) upcoming web series, Bimbo Zombie Killers! Moonshine of the Damned. The FX in this will easily be the most impressive of anything done on PEI - although, that's not really saying too much since I'm the only person doing FX like this locally at the moment.

For every person who places an order, their name will go into a draw to win one of the larger props be specifically made for this series, and there's going to be some awesome one. Could be worth well over $100 retail. And, you'll also get a thanks in the final credits of the series - so snag one of these bad boys before they're all gone, only 200 are ever going to be made and the moulds will be destroyed once I make all 200.

If you've any questions or want to order one, send an email to brains@themonkeyrodeo.com.

Thursday, October 04, 2012

Silicone Zombie Mask

So here's the "Uber-Jesse Zombie" mask that was to have been used in the BZK! web series. I wouldn't say I'm terribly experienced in making silicone masks, in fact this is the 2nd one I've attempted. The other was years ago and was done wrong, as a result it was very expensive (too thick and used way too much silicone) so I never really went back to try again.

I had the idea of going thinner and to re-enforce the entire head, that than just the eyes, mouth, nose and ears - that way I'd be sure it was tough enough. This was confirmed by a couple awesomely helpful guys I met at the CHAC back in April, who really knew their stuff. I wished to hell I could remember their names offhand, but I suck at names.

When BZK! came around again and I was applying for an FX grant I decided to give it one more try and after putting it off several times I finally got it sculpted, I was really happy with the sculpt and finally took to making the mould. Here's where things when slightly pear-shaped. I was using a material called EpoxAcoat Red, which is actually not too bad to work with and pretty fast overall - however, it calls for two thin coats and then you apply a backing materials. The problem was in experience with the Red and it tend to draw up a little in random spot causing holes - which you can fill in on your 2nd coat.

The surface of the mould was great, and fairly easy to clean out. I used Monster Makers clay and about 95% of it just pulled right out. That last 5% was a bugger, but using a head gun and mineral spirits took no time at all.

The problem I mentioned before was the edges of the mould, where the two halves meet. Since it's a bit of a 90 degree angle, in some places the Red just refused to settle in properly and left some open spots. And upon applying the backing, it left other open spots just under the surface. As a result the edge, right were the two halves meet was broken and shipped and just poor in spots. My thought was to just do a 3rd and 4th coat along that seam to really thicken and re-enforce the mould where it needs it most. Next time.

And man, was this thing a bugger to demould. Removing the halves from the original sculpt took 3 hours and there was some damage done to the mould itself. While I hated using Shell Shock (the material I used on the original silicone mask attempt years ago), it was tough and sturdy. I might try it again, not sure yet.

I poured it last night, demoulded (about an hour) this morning and was kind of pleased with the results. There were some air pockets in places where the re-enforcing material didn't allow the silicone to flow around it properly, but overall it turned out well.

I was able to identify problem spots where I'll be re-enforcing for the next one and it should be good enough to sell maybe. I'll be using the original to do a paint test.

Here the bugger is though in all his undead, fleshy looking glory.
 If I do offer them up for sale, it will hopefully be very soon, in a very limited edition (10 maybe?) and at a very low cost. I'm thinking $250 each. These things normally retail around $500-$600 if you've ever seen silicone masks before.

That's it. I've got ideas for a 2nd one, not a zombie, I might attempt at some point in the future, but I don't think I'll get too heavily into doing silicone masks just yet. Maybe another year or two.

Saturday, September 15, 2012

Day 5 over and done with.

Day 5 on Bimbo Zombie Killers! Undead in the Water is over with, without too much fuss. It was a bit of a pain to schedule since one actress couldn't make it, but in a way it all worked, because there was no way we'd have gotten it all done and we got done the worst of it. So next time, much easier.


Here's all our crap, you can't see most of it actually, but it's all there. I realized once we got the location I'd forgotten the sledgehammer prop, so thankfully, Julia ran back to Hazel Grove and got it. That was pretty damned awesome of her.

A friend of Tim Wartman's came along as our zombie for the day - it wasn't until I was soaking him in blood that I realized what his shirt said. And even he didn't get the significance right away - but we got a good shot of it, so hopefully it read well under the blood onscreen.

The fake axe in the arm gag worked perfectly, pretty damned happy with how it turned out.


I think John is loving that shotgun, he does look pretty bad ass with it.


Okay, not so bad ass here.


and Tim Gormley showing off one of the props of the day.

Cast shot, from left to right: Mark Wells, Tim Gormley, Tim Wartman, Julia MacDougall, Julie Laforest, Mary Gaudet, John MacDonald and Bill Pineau.

To was the first time I was doing two shoots in one day, luckily the second was too big a deal, but I realized pretty quick how terribly unprepared I was for it. Hopefully it'll all turn out.


And finally, the best line of the day:

And don't forget, we've got 18 days left on the fundraising campaign, we need all the help we can get. There's a link on the right sidebar.

Friday, September 14, 2012

The Corpse Head prop

This isn't so much a "how to" post so much as archiving or for curiosity. The Corpse Head prop was one I wanted to make early on, but because we had to start shooting before we had any money it was scraped in favour of a cheap paper mache one. Well, since then our lead redneck villain had to drop out and those scenes all need to be reshot (as well as rewritten) so I got my chance to do this bad boy up and I have to say I'm really happy with the result so far. And yes, I believe I will be offering this up for sale online, but it won't be cheap.

So, I had the idea of what I wanted to do early on and how I wanted to do it too. I have a medical skeleton skull so I used it as my base. Kind of cheating, but it did help speed things up and remove a lot of guess work in making it look alright.

I start by slapping clay onto the skull and getting the basic shape. Leaving the teeth exposed because I didn't feel like sculpting them, especially with everything else I'm sculpting these days I'm willing to cut corners where it works.

After a few hours of sculpting I ended up with this, not too bad looking. I gave him some wounds and whatnot that will match up with a corresponding silicone mask that I'll be making soon.

I used Rebound 25 to make the mould, I decided not to make it a 2 part mould since it will be a somewhat soft(ish) final piece. So I just coated the whole thing making allowing that it would be split up the back of thead.

I don't recall how long it took to do the mould, but since I started in the evening I guess it was at least another day. Here's the final silicone mould with a Pasti-Paste support shell. You can see what looks like a bit of a ridge here along the back of the head, that's there I split it open.

Here's the whole thing pulled apart. It was a bit of a struggle getting the clay and the skull out, but it eventually ripped out. You can see the silicone mould flipped inside out here.

And the poor skull afterwards. The lower jaw was originally attached with springs, they got stretched and destroyed. Ah well, it finally served a purpose after all these years. I got this in a thing called "20 lb Bag of Bones" years ago, you can no longer get them, only 10 lbs bags now. That's the way things were in those days.

Wasn't much to see until this point. But I used Vytaflex 40 to do a slush casting in the mould, which was tricky since I've never used the stuff before and it's pretty runny. I did one layer at a time, letting it thicken up a bit each time. Not a perfect method, but it did work. I have a nice urethane skin filled with flexible foam inside. I even attached a pvc pipe with a hole drilled it in to attach it to the corpse body.

It's not done, it need to be all painted up. That's the next step in experimenting. I've never painted urethane, but I'm well aware it's a pain in the ass. My plan is to use another Smooth-On product called Brush-On 40 that can be tinted and thinning out and supposedly makes for a good urethane paint. We'll see soon enough.